Python OpenCV Image Filtering
In this article, you will learn different image filtering techniques using the Python OpenCV. Python OpenCV has several filtering techniques to perform smoothing operations on images. These smoothing techniques are generally used to reduce noise, reduce detail, and so on. These techniques can also be applied to reduce the pixelated effect in low resolution images.
These are the most commonly used OpenCV image smoothing filters-
- Averaging Filter
- Gaussian Filter
- Median Filter
- Bilateral Filter
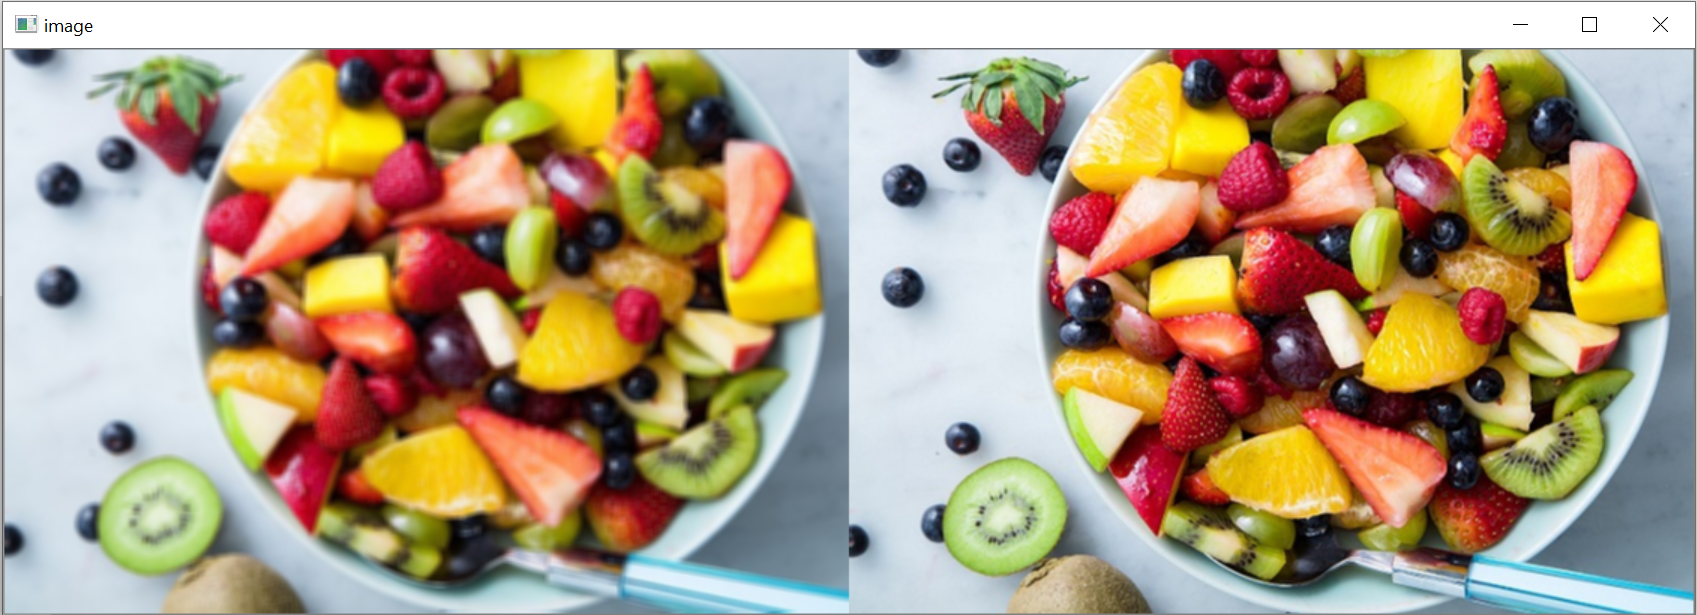
Averaging Filter
The Averaging Filter technique takes the average of all the pixels under the kernel area and replaces the central element. The functions cv2.blur() and cv2.boxFilter() can be used to perform the averaging filter. Both functions smooth an image using the kernel.
Syntax of cv2.blur()
cv2.blur(image, ksize)Here, the image is the image source, and ksize is the size of blurring kernel.
Syntax of cv2.boxFilter()
cv2.boxFilter(src, dst, depth, ksize, anchor, normalize, bordertype)Here, the src is the image source, dst is the destination image of the same size, and depth denotes the output image depth. The anchor denotes the anchor points. By default, it is at the kernel point (cordinate (-1,1)). The ksize is the size of blurring kernel and normalize is the flag which specifies whether the kernel should be normalized or not. The bordertype is an integer object that represents the type of the border used.
Example of Averaging Filter
import cv2
import numpy as np

# image path
path = r'salad.jpg'

# using imread()
img = cv2.imread(path)

im1 = cv2.blur(img,(5,5))
im2 = cv2.boxFilter(img, -1, (2, 2), normalize=True)

cv2.imshow('image', np.hstack((im1, im2)))
cv2.waitKey(0);
cv2.destroyAllWindows();
cv2.waitKey(1)
Gaussian Filter
The OpenCV Gaussian filtering provides the cv2.GaussianBlur() method to blur an image by using a Gaussian Kernel. Each pixel in an image gets multiplied by a Gaussian Kernel. It means, a Gaussian Kernel is a square array of pixels.
Syntax of Gaussian Filter
cv2.GaussianBlur(src, ksize, sigma_x, dst, sigma_y, border_type)src- the input image,
ksize- Gaussian kernel size (width and height), the width and height can have different values and must be positive and odd,
sigma_x- Gaussian kernel standard deviation along the X-axis,
dst- output image,
sigma_y- Gaussian kernel standard deviation along the Y-axis,
boader_type- image boundaries.
Example of Gaussian
import cv2
import numpy

# image path
path = r'cat.jpg'

# using imread()
img = cv2.imread(path)

dst = cv2.GaussianBlur(img,(5,5),cv2.BORDER_DEFAULT)

cv2.imshow('image', numpy.hstack((img, dst)))
cv2.waitKey(0);
cv2.destroyAllWindows();
cv2.waitKey(1)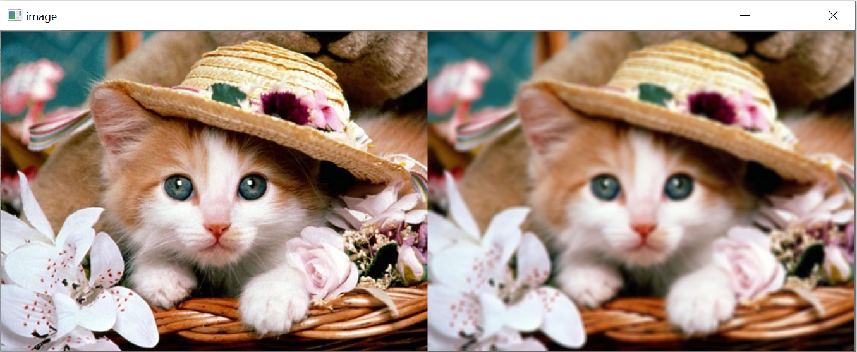
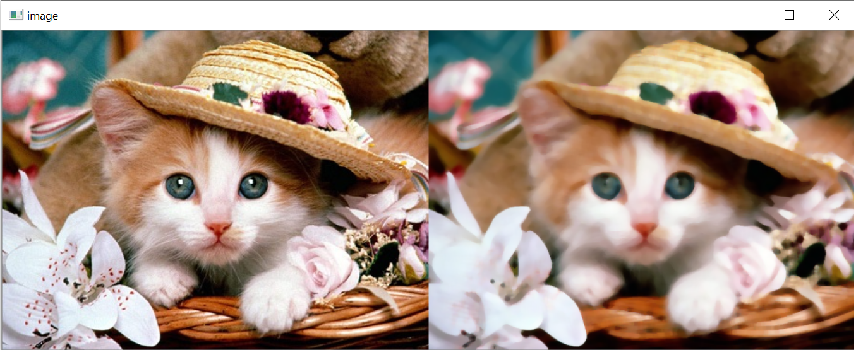
Median Filtering
Python OpenCV provides the cv2.medianBlur() function to blur the image with a median kernel. This is a non-linear filtering technique. It is highly effective in removing salt-and-pepper noise. This takes the median of all the pixels under the kernel area and replaces the central component with this median value. Since we are taking a middle, the output image will have no new pixel esteems other than that in the input image.
Syntax of Median Filter
cv2.medianBlur(image, ksize)Here, the image represents the image for operation. The ksize is a size object representing the size of the kernel.
Example of Median Filter
In the given program, we are importing the required modules. Then we are reading the image using the imread() function. Then we are utilizing the medianBlur() function to remove the noise from the image. Then we are displaying the noiseless image as the output on the screen.
import cv2
import numpy

# image path
path = r'cat.jpg'

# using imread()
img = cv2.imread(path)
dst = cv2.medianBlur(img,7)

cv2.imshow('image', numpy.hstack((img, dst)))
cv2.waitKey(0);
cv2.destroyAllWindows();
cv2.waitKey(1)
Bilateral Filter
Python OpenCV provides the cv2.bilateralFilter() function to blur the image with a bilateral filter. This function can be applied to reduce noise while keeping the edges sharp.
Syntax of Bilateral Filter
cv2.bilateralFilter(image, dst, d, sigmaColor, sigmaSpace) image- image source,
dst- destination image,
d- specifies the diameter of the pixel neighbourhood,
sigmaColor- specifies the filter sigma in the color space.
sigmaSpace- specifies the filter sigma in the coordinate space.
Example of Bilateral
import cv2
import numpy

# image path
path = r'salad.jpg'

# using imread()
img = cv2.imread(path)
dst = cv2.bilateralFilter(img, -1, 5, 5)

cv2.imshow('image', numpy.hstack((img, dst)))
cv2.waitKey(0);
cv2.destroyAllWindows();
cv2.waitKey(1)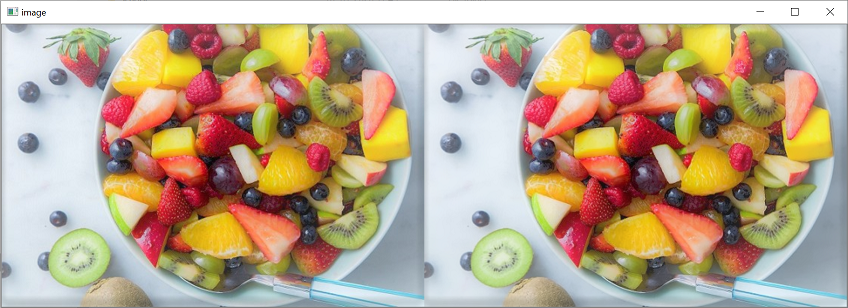
Related Articles
Python OpenCV Overview and ExamplesDraw different shapes on image using Python OpenCV
OpenCV Logical Operators- Bitwise AND, OR, NOR, XOR
Python OpenCV Histogram of Grayscale Image
Python OpenCV Image Filtering
Python OpenCV Overlaying or Blending Two Images
Python OpenCV Histogram of Color Image
Arithmetic Operations on Images using Python OpenCV
Detect Specific Color From Image using Python OpenCV
Capture a video in Python OpenCV and save
Contour Detection using Python OpenCV
Python OpenCV ColorMap
Adaptive Thresholding in Python OpenCV
Geometric Transformation OpenCV Python
Python program to check leap year
Python program to multiply two numbers
Python program to input week number and print week day
Python Read XML File Line By Line
Count consonants in a string Python